To make their gallery more closely resemble a real art gallery, many FLAG owners like to put furniture and tiny patrons inside. This bench is inexpensive (in case anyone mistakes it for art and removes it), can be scaled to your desired size, and is sturdy enough for your tiny patrons to sit on if they’re the right shape.

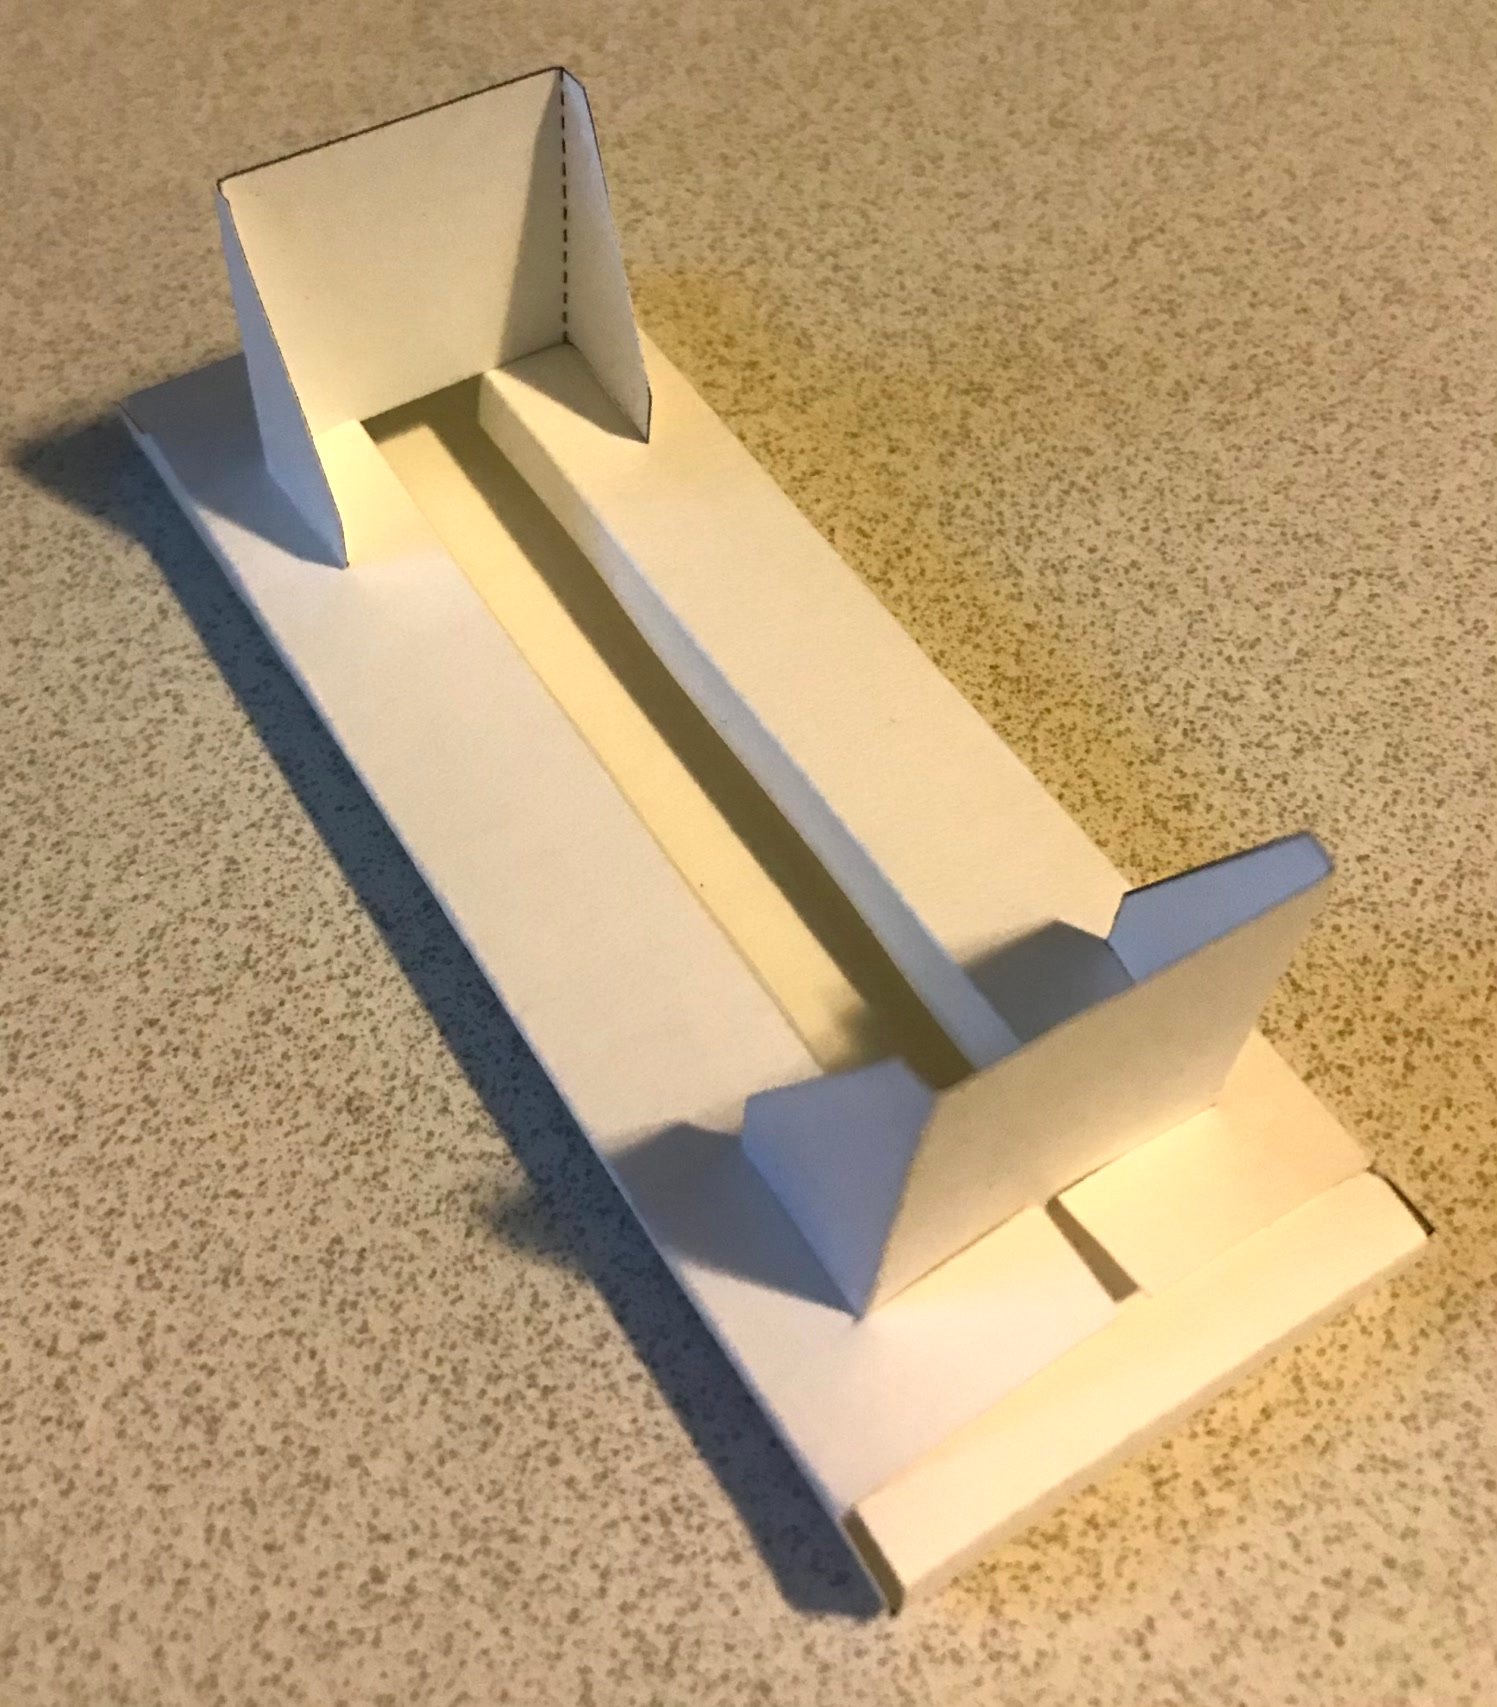

The bench is folded from a single sheet of cardstock, cut out and folded based on a template you print on the cardstock. It’s designed to not need adhesive (but add a dot or two of glue if you wish).
You can fit three this size on a sheet, and I’ve put three in the PDF file. The template is also available as an SVG file and a Cricut template (cuts and scoring), so you can modify it. I use the free program Inkscape for this — turn snap on and it’ll be much easier to edit.
Directions for Printing
The template is designed so the fold lines are inside of the model. If the cardstock has a “good” side, print the template on the other side.
Solid lines indicate cuts. Dashed lines are folds that fold in toward you, what origami enthusiasts call “valley” folds because the crease looks like a valley. Dotted lines are “mountain” folds which go the other way (origami folding instructions use dash-dot lines for this). This model curls around to put all the printed lines into the inside, like closing your hand to form a fist, so nearly all the folds are valley folds.
First, pre-crease all fold lines. I created a tool for this, which I call a “folding wedge.” It’s a thin piece of smooth hardwood cut with the edges at a 45 degree slant. But something with a sharp 90 degree corner should also do – I’ll still refer to that object as the “wedge”.
To use the wedge, align the fold line with the pointy edge, hold the paper firmly in place against the wedge’s flat side, and either press the paper against the edge with your fingers, or press against a table and pivot the wedge around the edge. Don’t pivot too far, or you’ll create another crease against the next corner of the wedge.
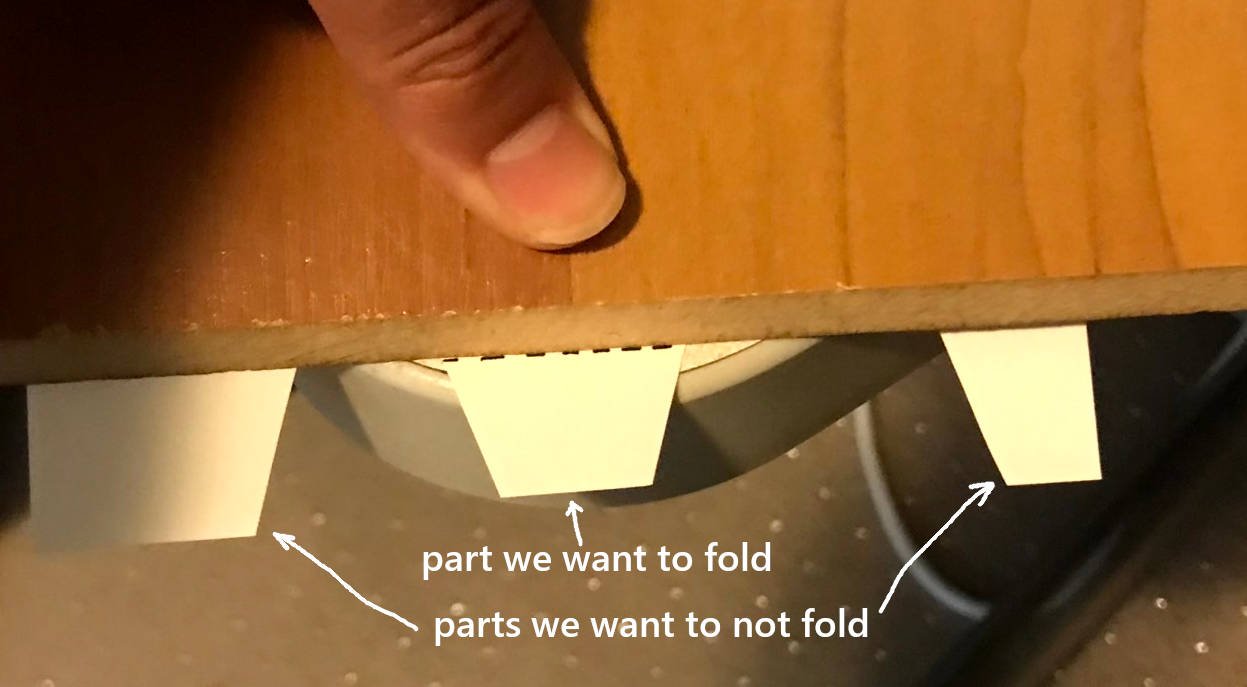
Take care to crease only the marked lines, else your model will not look as pretty. If a fold line intersects parts of the sheet you don’t want to fold (as folds 4, 6, and 7 below do), get those parts out of the line of fire. Either press the crease in with your fingers, or position it on the corner of the table so the parts you want not to fold hang over the edge.
After making the initial crease, fold it the rest of the way over, and use something hard to press the fold nice and sharp (I use the big flat side of the wedge). Then flatten it out again.
Once you’ve pre-creased everything, unfold it flat again, then read how to fold below.
Directions for Cricut
Use cardstock or other stiff material. It doesn’t matter which way faces up, in case your cardstock has a better side that you want facing out. You can fit three copies on a letter size page.
When you go to fold the model, decide which side should face out. Put that side facing down, then all the folds except #3 in the diagram below are toward you, so it all wraps in to hide the “bad” side.
How to fold
Fold in the order shown below– all are right angle folds:
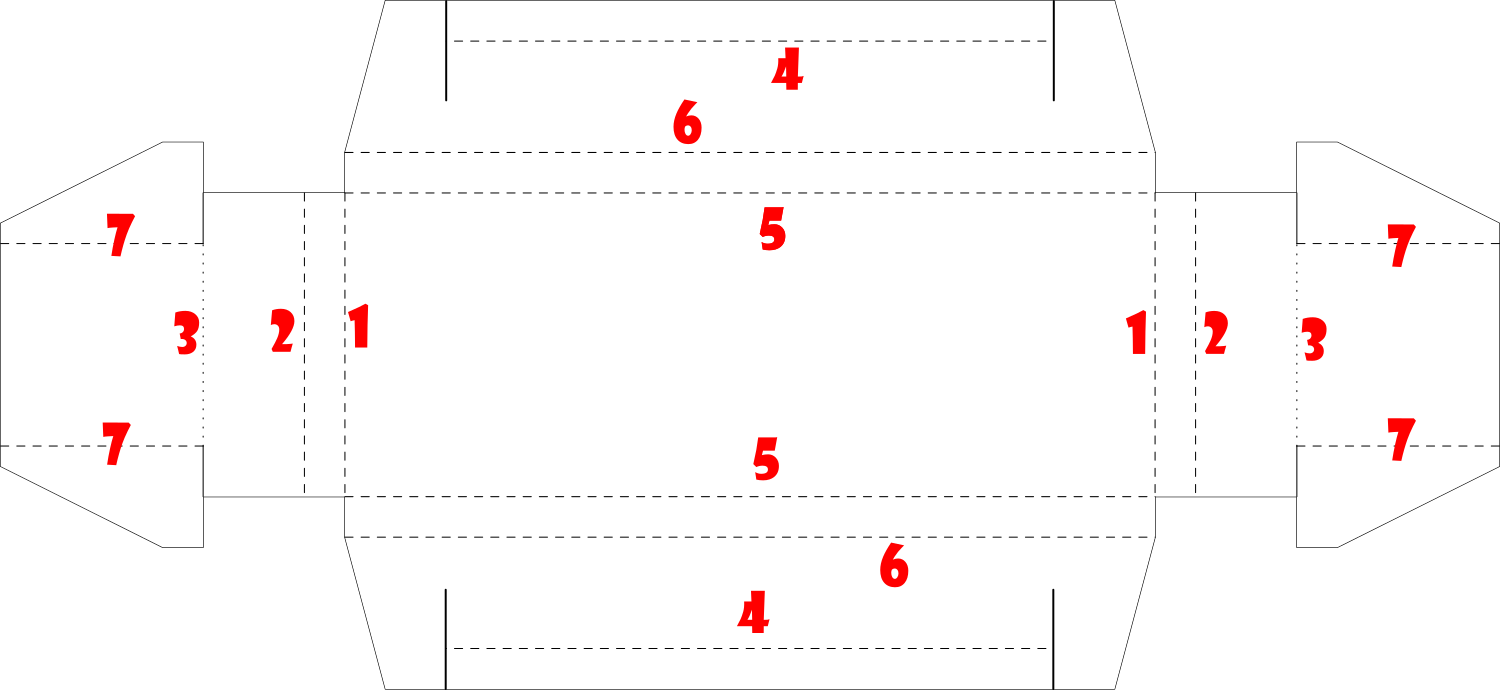
Fold 6 is a little tricky. The flattened-out leg must slide into the slots cut into the long edges. Work them carefully into place so they don’t bend or tear. Fold 7 then locks the legs into position. The bottom flaps angle in on purpose to make them less visible. This is the point you may want to add a little glue, to make them lie flatter.
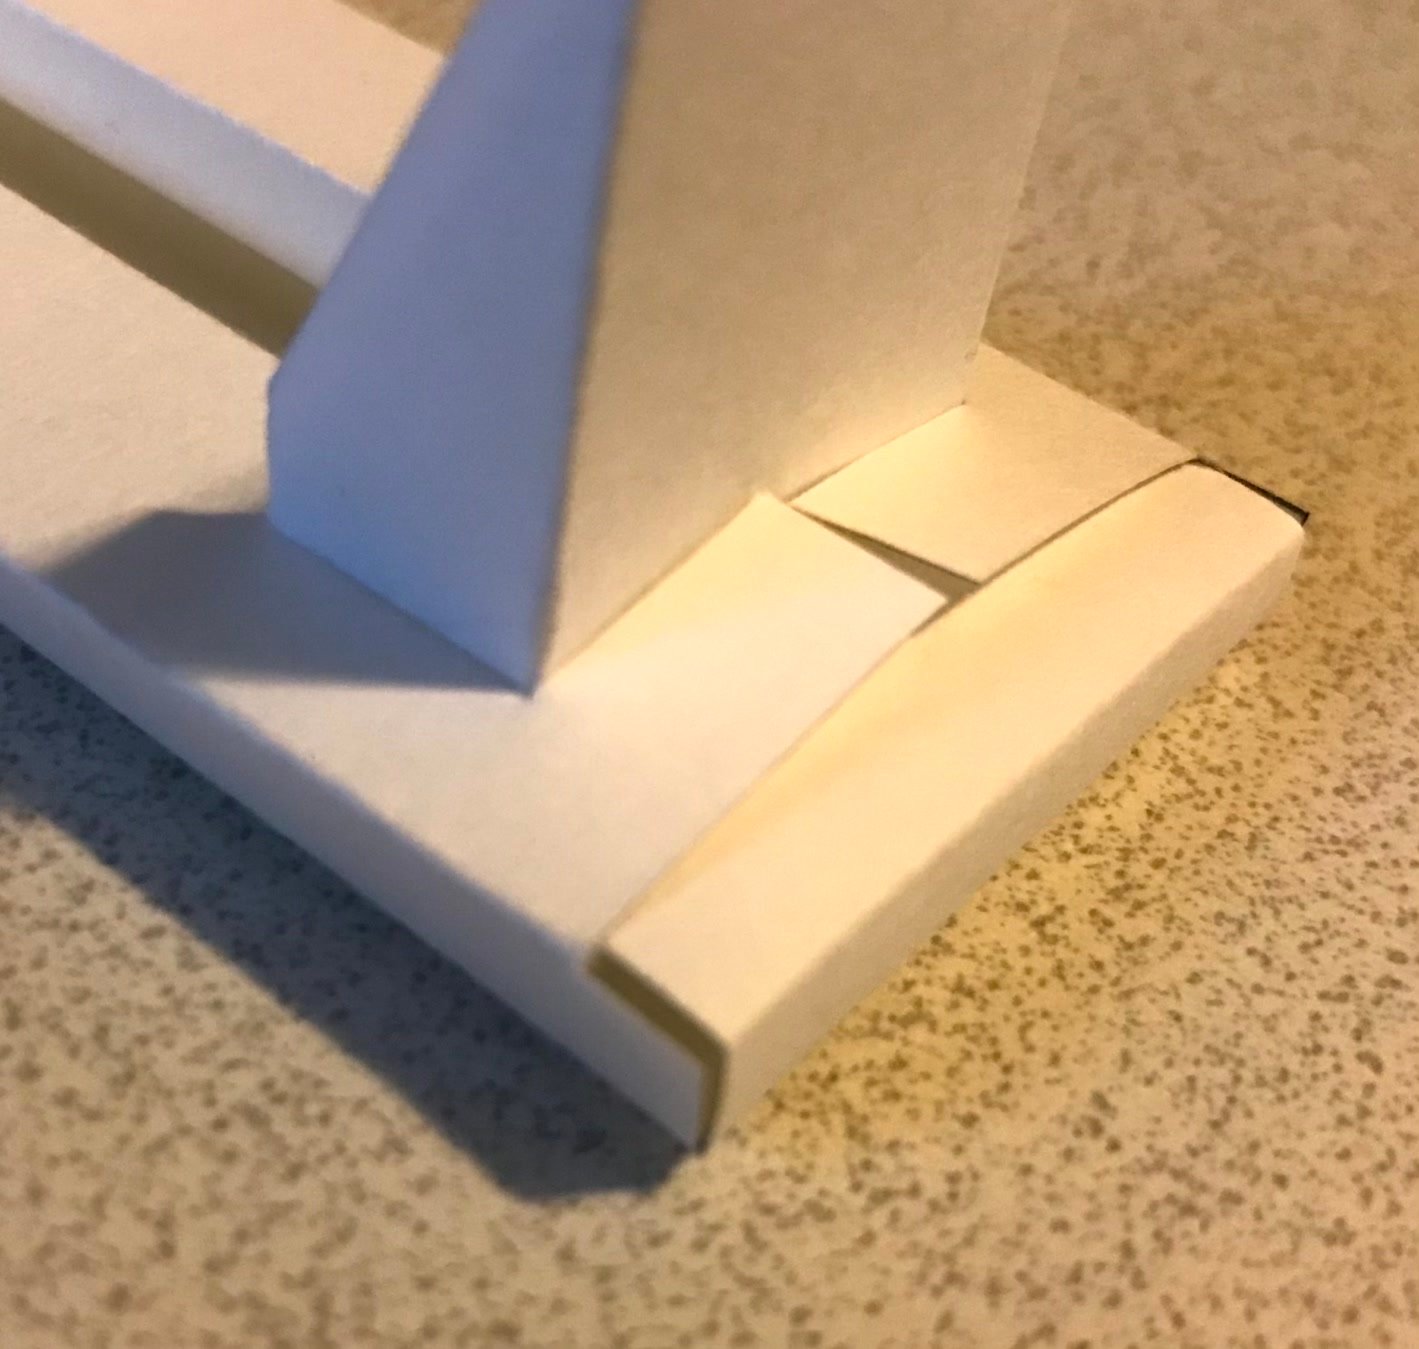
This picture is a little different from the latest version of the template, but same general idea.