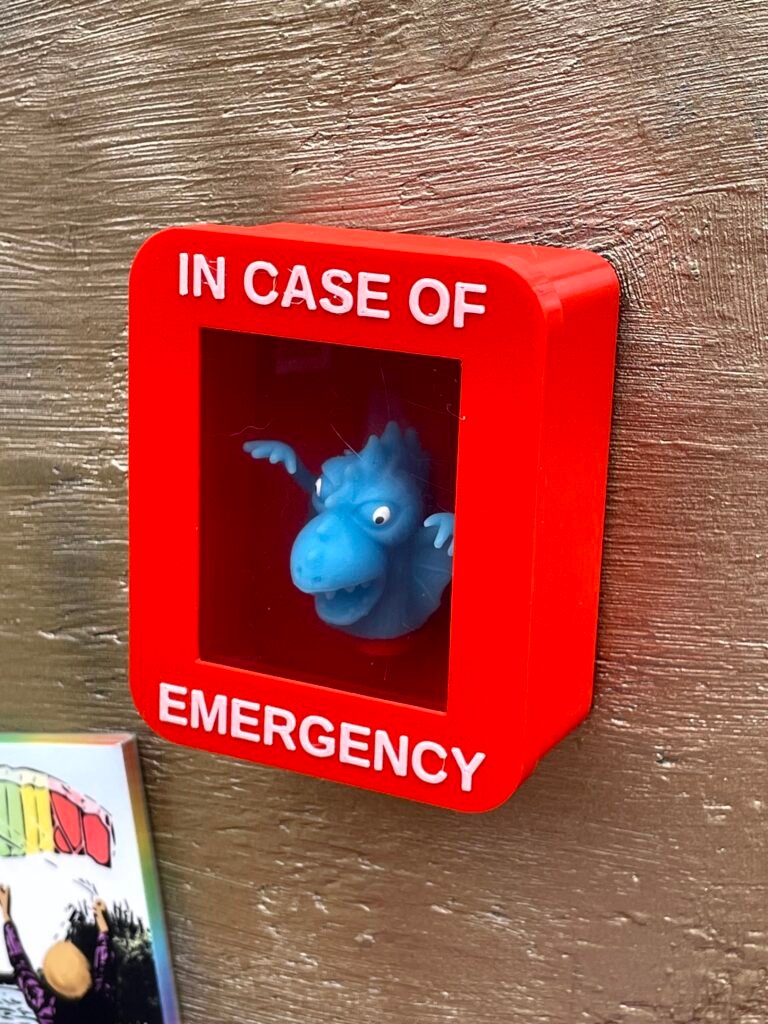
I’ve published the design for this 3D-printed box with a variety of holders you can use to mount different types of objects inside. You add a piece of plexiglass in the opening, a magnet on the back, and the contents, whatever you decide might be needed in case of an emergency.
The lid is just held on by the pressure of a snug fit. There are no clips or glue there. Glue is used to secure the window in place, and to add magnets on the back if you choose to do that.
The 3D Model
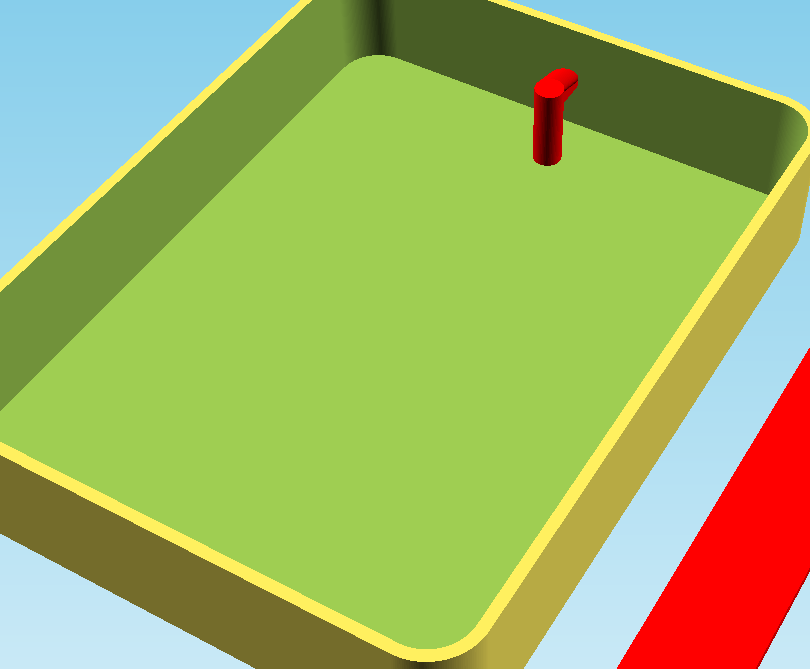
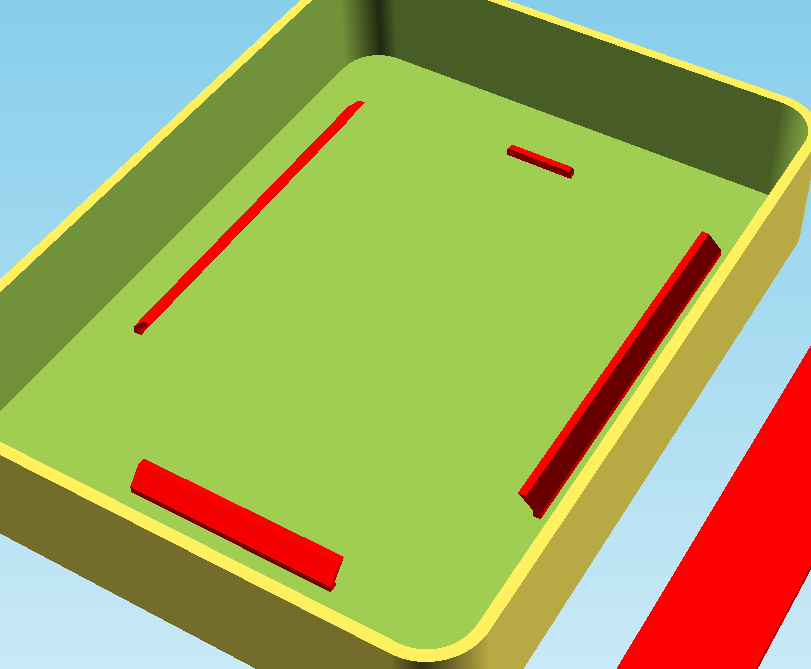
The box design is given as an OpenSCAD script, which lets you select parameters to control the dimensions of the box and the type of holder to use on the back. The different types of holder are shown below, highlighted in a contrasting color to the box for better visibility.
Here is the file:
Executing this script requires the BOSL2 library and a development version of OpenSCAD client with the roof function enabled in preferences.
Elsewhere on this site, I have a general guide on how to run OpenSCAD scripts and print the results. Here, I’m just going to talk about the aspects particular to this model.
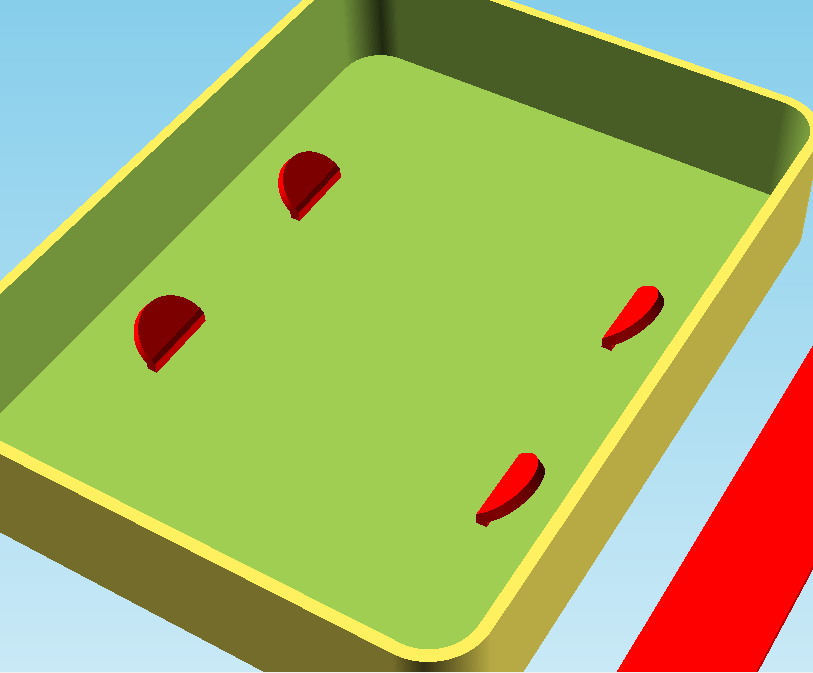
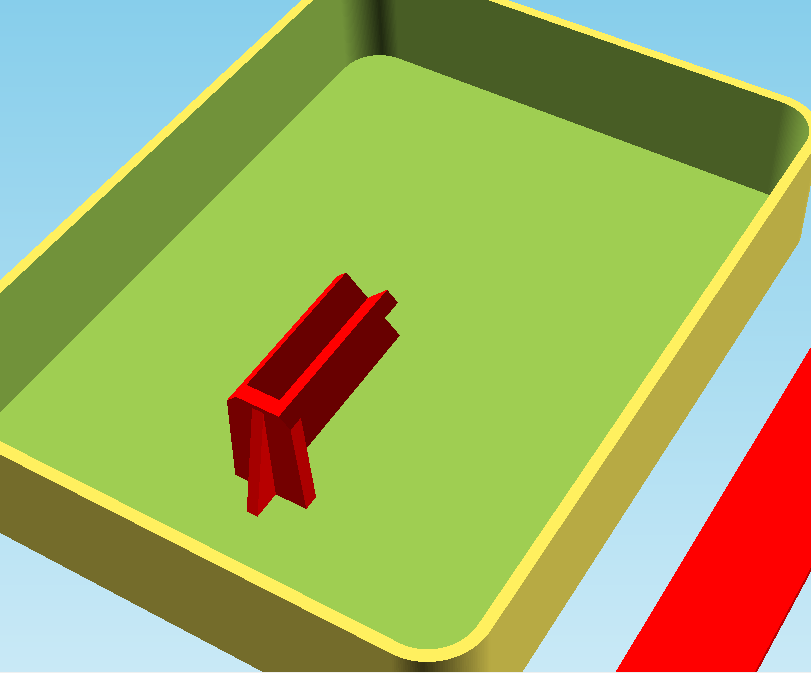
The options are:
- clips to add four little tabs to hook rubber binders onto.
- pole to make an upward-pointing rod to place something onto (such as a finger monster).
- hook to add a hook to hang something from.
- card holder to add inward-slanting guides to hold a flexible card in place.
- none to just print a plain box (not pictured).
Most of these options have an associated section of additional parameters to control the size and placement of the holder components. I’m hoping the labels of the parameters will be clear enough to let you customize as desired, but if not… experiment.
As with most multi-part models I publish, the parameters also include options to see the box in printing orientation, or assembled, or assembled with a cross section cut out to check fit. This selection just applies to the preview mode — when you render the model it always renders in printing orientation.
Printing considerations
The model is designed to print in two colors of filament — one for the box and most of the lid (assumed to be red), and a second color for the raised lettering on the lid (assumed to be white). If you don’t have a multi-color printer, you must use a slicer program that’ll let you insert a pause to let you change the filament reel at a specified height. I prefer PrusaSlicer, which is free.
Because of the color change, if you have a single-reel printer, you must print the bottoms and lids separately. The lid requires supports no matter what orientation you print it in. It makes the most sense to print it in the orientation the program generates it in, face up, so the supports attach to a surface that’s not visible while the lid is on.
Assembly
Once you’ve printed the components, add the plexiglass pane into the lid opening and glue a piece of magnavinyl onto the back to hang the box on appliances. You can buy magnetic tape at hobby stores, but I find it doesn’t stick well to 3D-printed surfaces, so either use extra glue to secure the tape, or get sheets of the stuff and cut large pieces to cover most of the back — and glue it on.
Where to get free magnavinyl
Sign shops often get magnavinyl in big rolls and end up throwing away lots of odd pieces they trim off the edges. These pieces are too small and fiddly to be of use to them, but are perfect for tiny artworks.
They also sometimes throw away entire signs because they contain typos, so they might have some recent botched jobs in the bins.
If you call them and patiently explain what you’re doing, you may be able to get them to set scraps and misprints aside for you rather than immediately throwing them away. You will probably be told that they don’t have leftover scraps, and it may take some work to get them to understand that you’re aware they might not have any now because they immediately throw them away, but that could set some aside for you from their next project, preventing that material from going to waste.
Making plexiglass panes
Unless you want to pay a dollar or more apiece for custom cut pieces of plexiglass, you can cut your own to size from larger sheets. I get mine at Michael’s, in the framing department, where there are large sheets 1.4mm thick. You can score these with a box cutter 2 or 3 times, and they’ll break cleanly. The tricky part is keeping your score lines nice straight and making all the panes the same size. I do this by clamping the pane in a mat cutter and using a box knife to make my score lines, keeping the knife carefully upright. I’ve been tempted to design a box-knife holder that would ride on the rail of the box cutter to make a consistent cut, but my manual method seems to work well enough for this application.
I don’t recommend cutting plexiglass with a laser cutter. You need a mighty strong laser to affect plexiglass, because the light mostly goes right through without heating the material. And even if you do manage to cut it, burning acrylic gives off noxious fumes and tends to bulge up at the edges where material melted out of the path of the laser.
Leave the protective layer on the plexiglass sheet until you’re ready to use it. This prevents smudges and scratches from your handling it. Of course, if you’re scoring and snapping it, you’ve only cut the protective layer on one side. Keep a knife handy to cut the film on the other side after you snap, so you can keep it in place.